Hey guys do you want to use android OS on your pc or laptop; I’m going to show you how to do that. You want to play android games, you want to use whatsapp on your pc, you want to play clash of clans on your pc; this is the article for you. We will be installing the android 4.3 version on virtual box, the same way we use any linux OS or windows in virtual box. Follow the below steps very carefully.
Things will be needed
Virtual box latest version – download
Android ISO latest version from Google – download
Don’t worry if this looks very complicated just follow the steps and you will end up with android installed on your pc with virtual box. The steps while installing android will look difficult but it’s very easy if you just try once. For every step the screenshots are added which will help you. So now let’s begin.
Creating virtual machine
Step 1 :
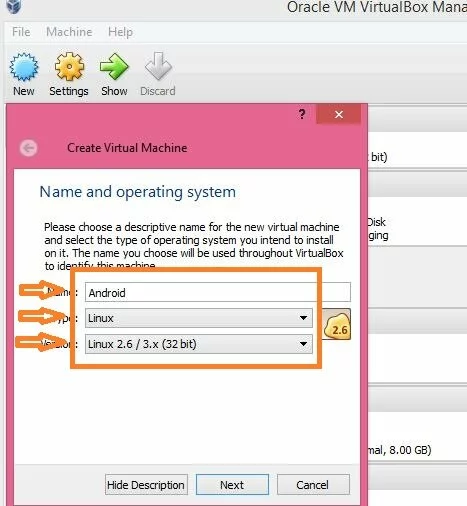
Install the virtual box you have downloaded and open it. Now click on new button.
Give the name as android and select the type as linux and version 2.6/3.x 32 bit as shown in above image and click next.
Step 2 :
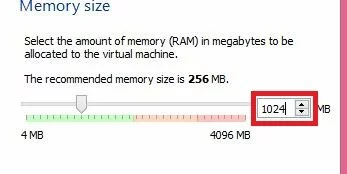
Now select the RAM for your virtual machine, make sure you select at least 512MB. And then click next.
Step 3 :
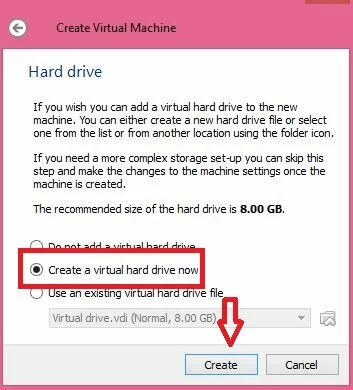
Select create a virtual hard drive now if you are creating first time or else if you have created a drive earlier you select with last option and click create.
Step 4 :
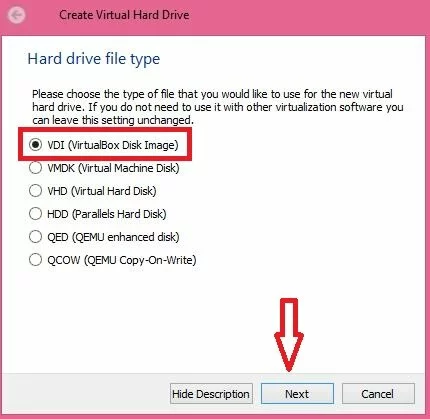
Now just select the first option VDI and click next and in next windows select fixed and click next.
Step 5 :
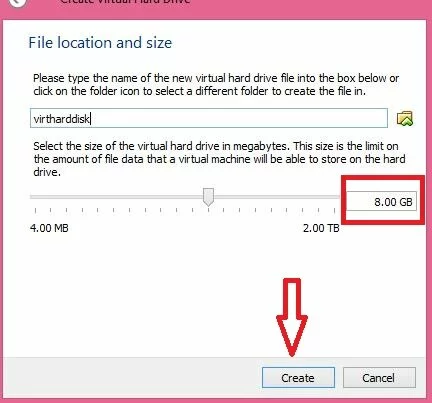
Here give the name for your virtual hard drive then select the size of disk, select at least 2GB of space. Then click create. Now your virtual drive will be created.
Installing android
We have created a virtual hard disk and now we will install android on it. Here you need to follow the steps very carefully.
Step 1 :
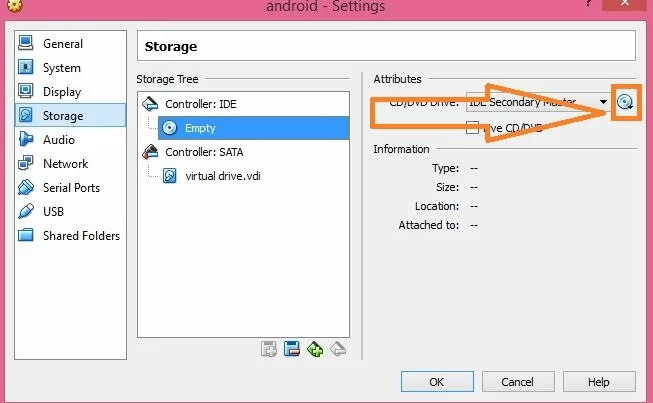
In your virtual box at left panel you will see a name android (you have given while creating virtual machine in step 1 above) , right click on it and select settings you will see a new window in which select storage as shown in above image.
Now click on Empty and on right side click on a cd/dvd button and with the first option add the iso file which you have downloaded from google as listed in starting of article. Click ok and you will be back at virtual box main window.
Step 2 :
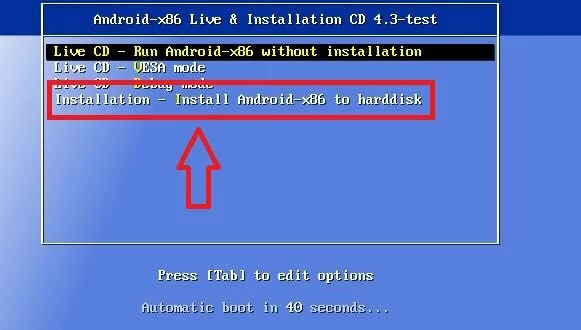
Double click on android and you will see above screen. Select the last option install android with the arrow keys and press enter.
Step 3 :
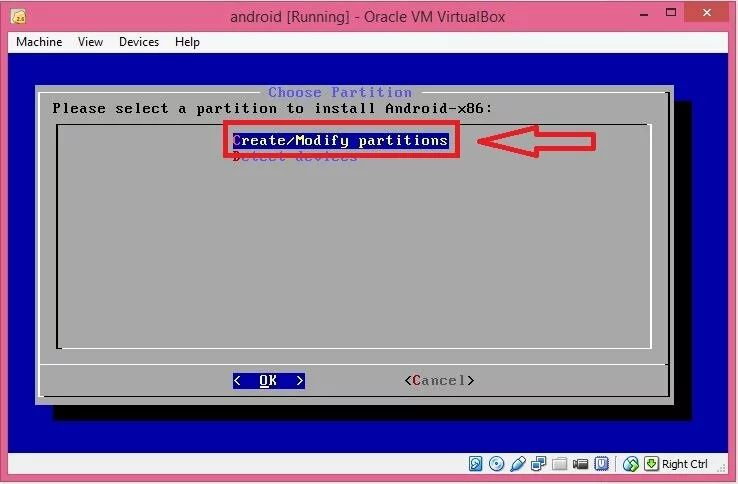
Now select create/modify partition and press enter.
Step 4 :
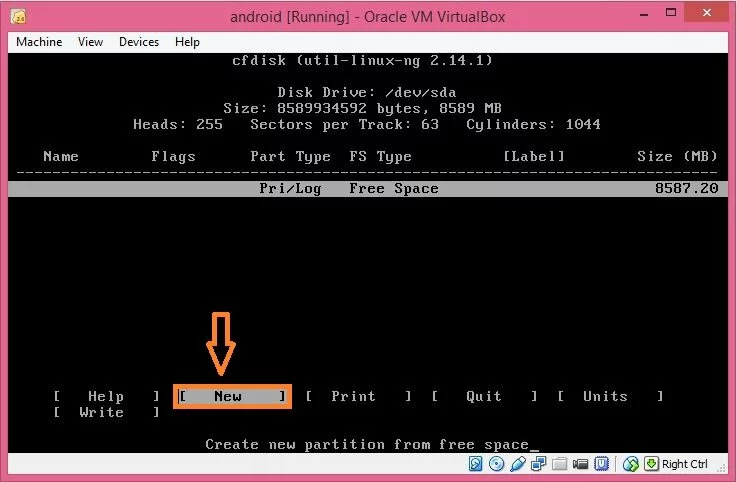
Move to NEW with the arrow keys as shown in above image and press enter.
Step 5 :
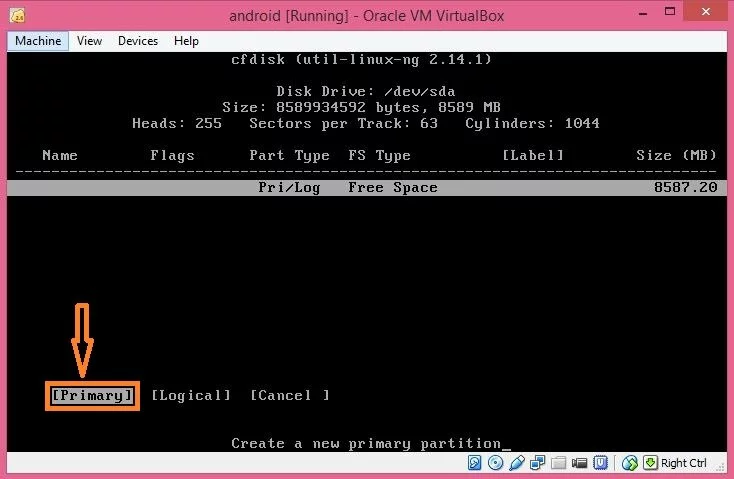
Select PRIMARY and press enter.
Step 6 :
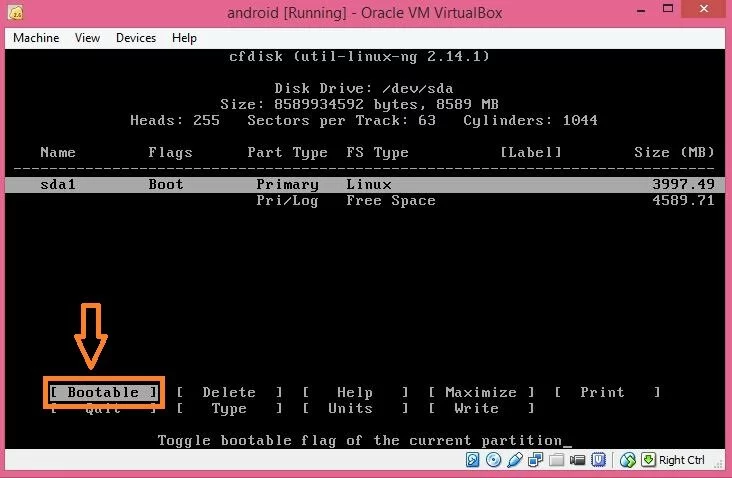
Select bootable and press enter.
Step 7 :
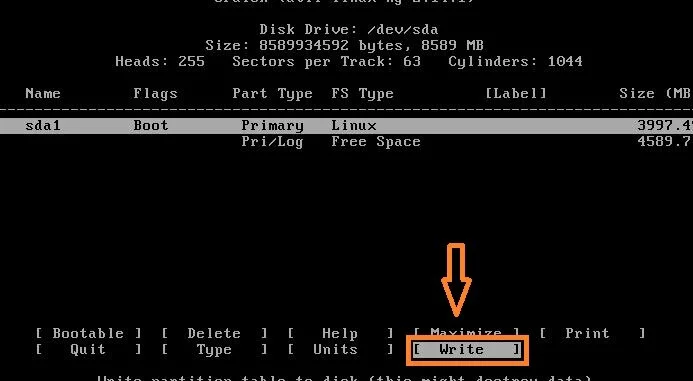
Now select WRITE with arrow keys and press enter.
Step 8 :
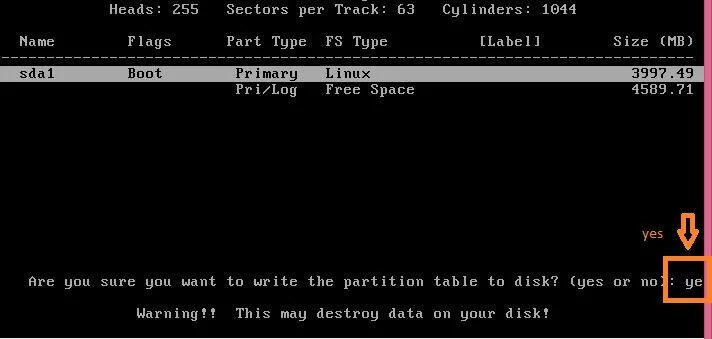
Type yes and press enter.
Step 10 :
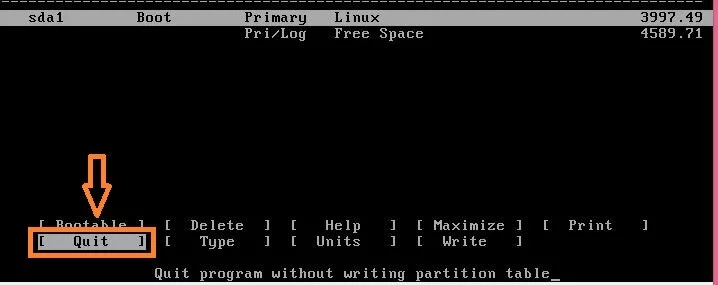
Now select Quit and press enter.
Step 10 :
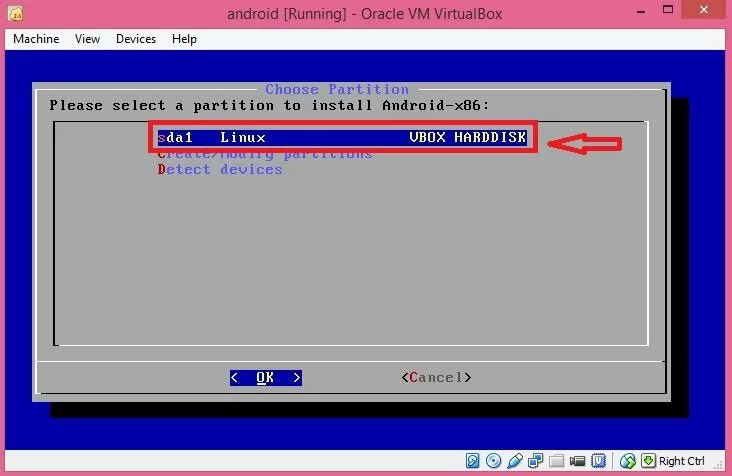
Select the first option as shown above and press enter.
Step 11 :
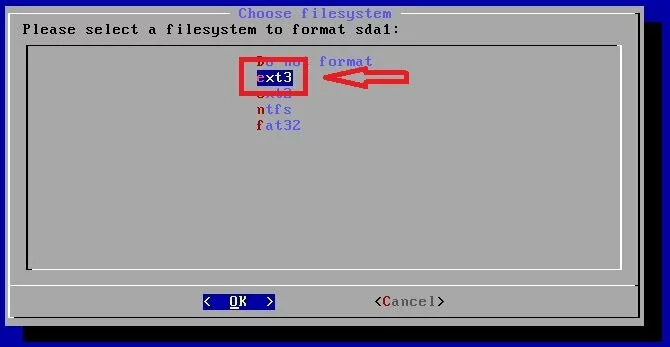
Choose the partition type at ext3 as shown and press enter.
Step 12 :
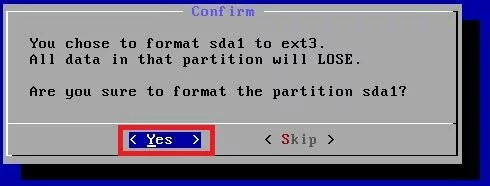
Select yes to format the drive and press enter. (Don’t worry; you are not going lose any of your data on your hard drive). Again select yes and press enter.
Step 13 :
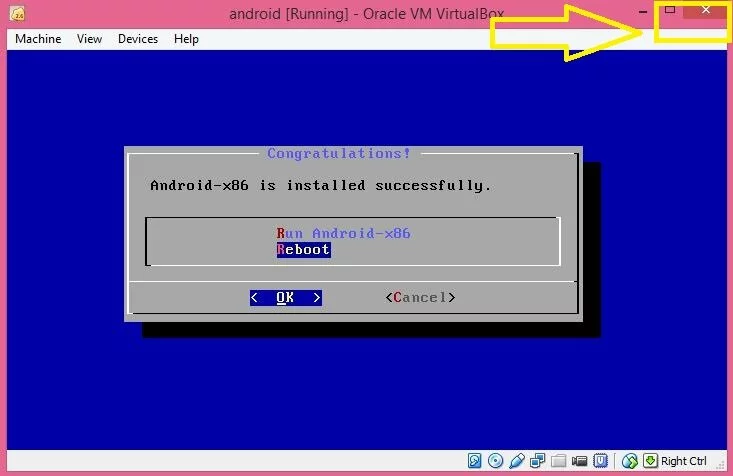
Now you will see a message “Successfully installed”. Don’t select run android, now close this window with the close button on top right corner, if prompted select shutdown machine and click ok.
Step 14 :
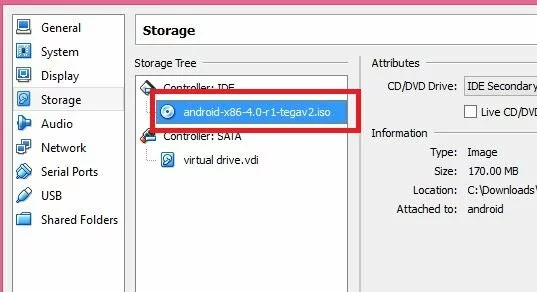
Right click on android on left side panel of virtual box and go to settings -> storage then right click on the iso file listed under controller. Click “remove attachment” click ok and you are done.
Step 15 :
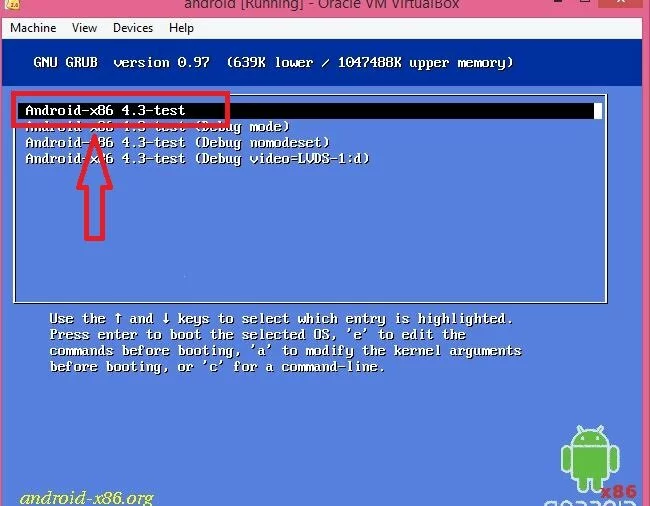
Now double click on android and your android os will start choose first option and press enter.
Step 16 :
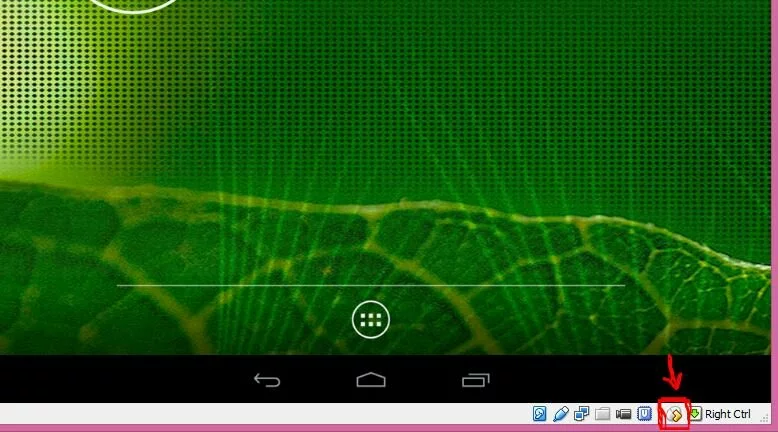
When the os is ready and you don’t see your mouse inside the virtual box just right click at bottom right corner (shown in image) and choose disable mouse integration.
You have successfully installed android and you can now install any android app from play store. Enjoy..!!!!!!
Please share and comment for any other help.





 Copyright © 2014 Geekybits. All rights reserved.